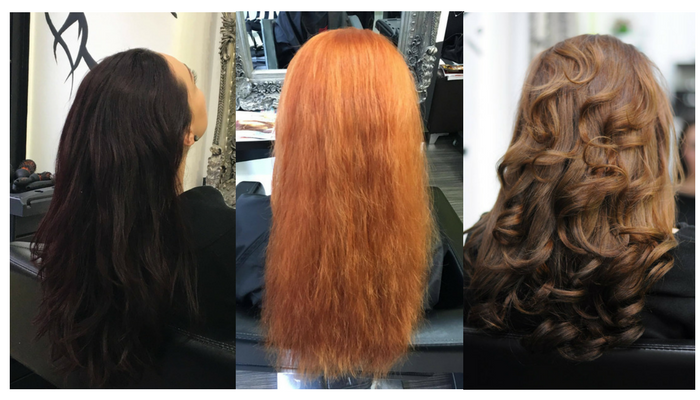
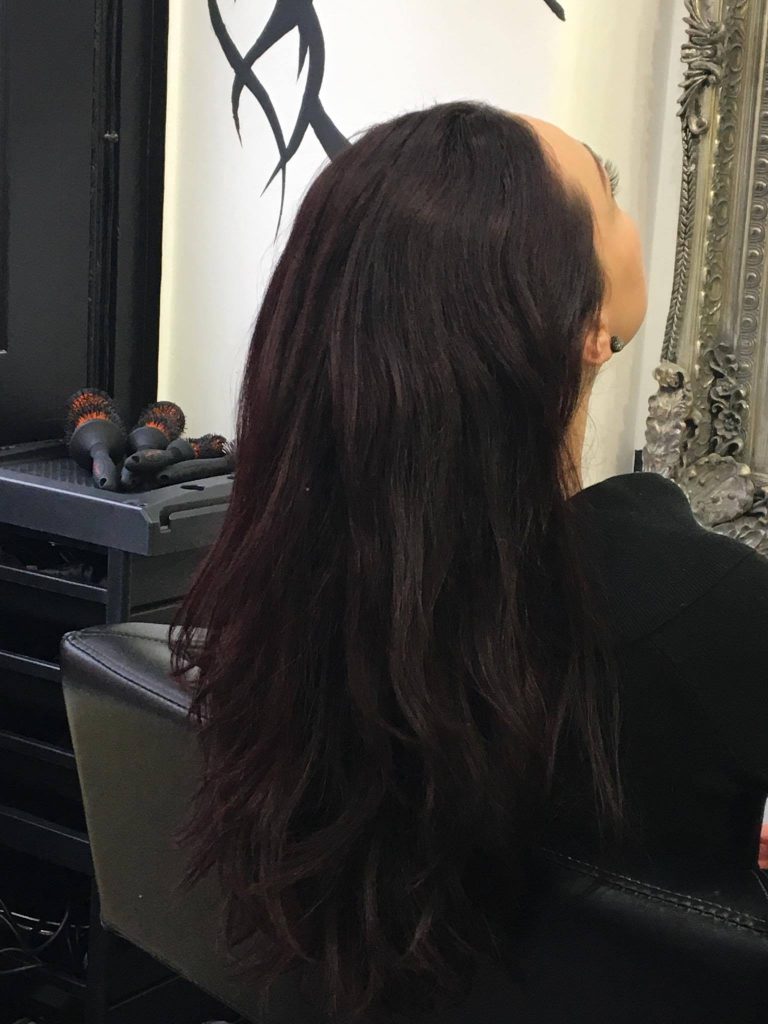
The start: Brown hair with aubergine hues
Removing colour pigments, aka Bleaching – Case Study
Our client wanted to go a bit lighter and naturally brighter. She wanted to achieve a very natural hazelnut-chestnut kind of shade that is approximately 4 shades lighter than her own. We had to start with bleaching …
Bleach opens the hair shaft by raising the hair’s outer cuticle, allowing the bleaching agent to fully penetrate. It then strips pigments and removes colour from the hair by the process of oxidation. Oxidation decolourises the pigments in your hair shaft and makes dark brown hair turn fox red.
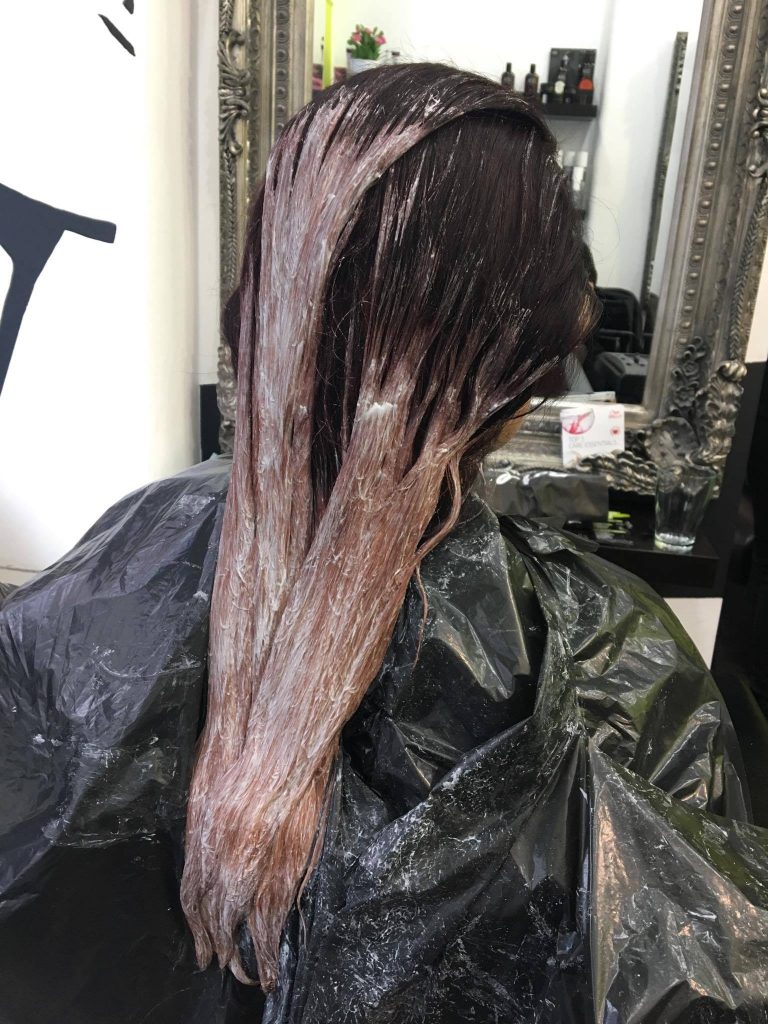
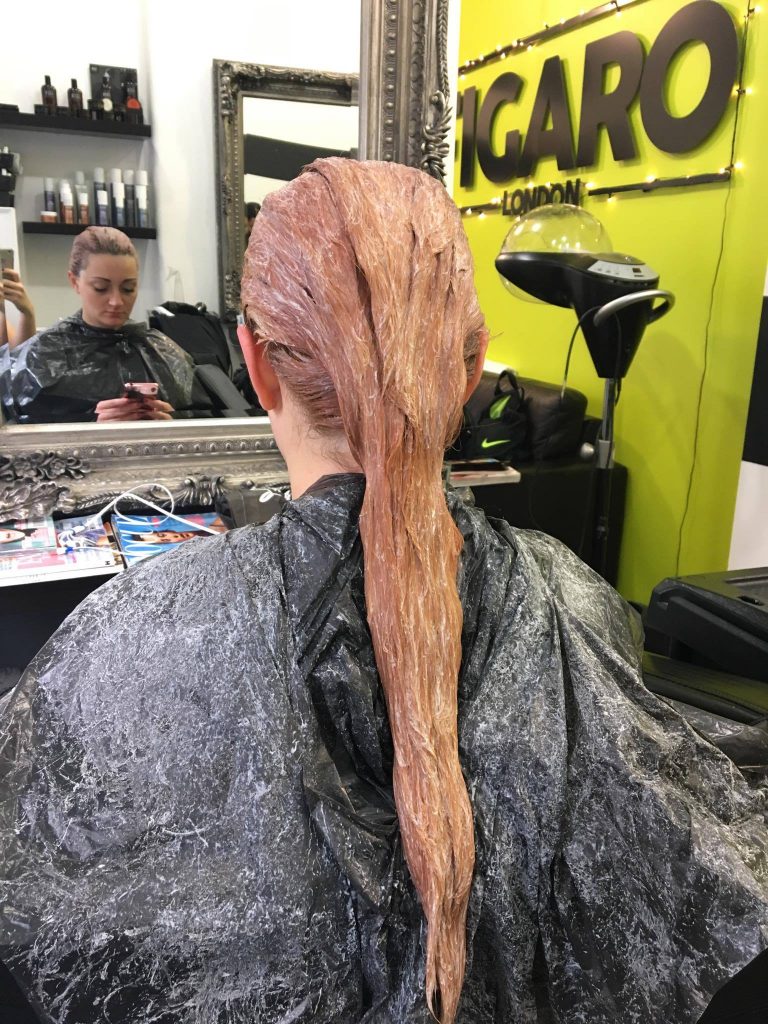
Our hairdresser started to apply bleach from the bottom and worked her way up gradually. It’s because heat speeds up the bleaching process and the closer you get to the scalp, the more intensive the heat. After the application of bleach, we wait and see how the hair reacts:
First step of bleach – a waiting game
In this client’s case, the second step of bleaching was necessary in order get a completely even colour base. The longer and more voluminous the hair, the more probable it is that second bleaching will be needed.
Second bleaching, the formula is as gentle as possible
Once the natural top pigments are removed, we get this mixture of fox red, brass, copper, orange and yellow shade:
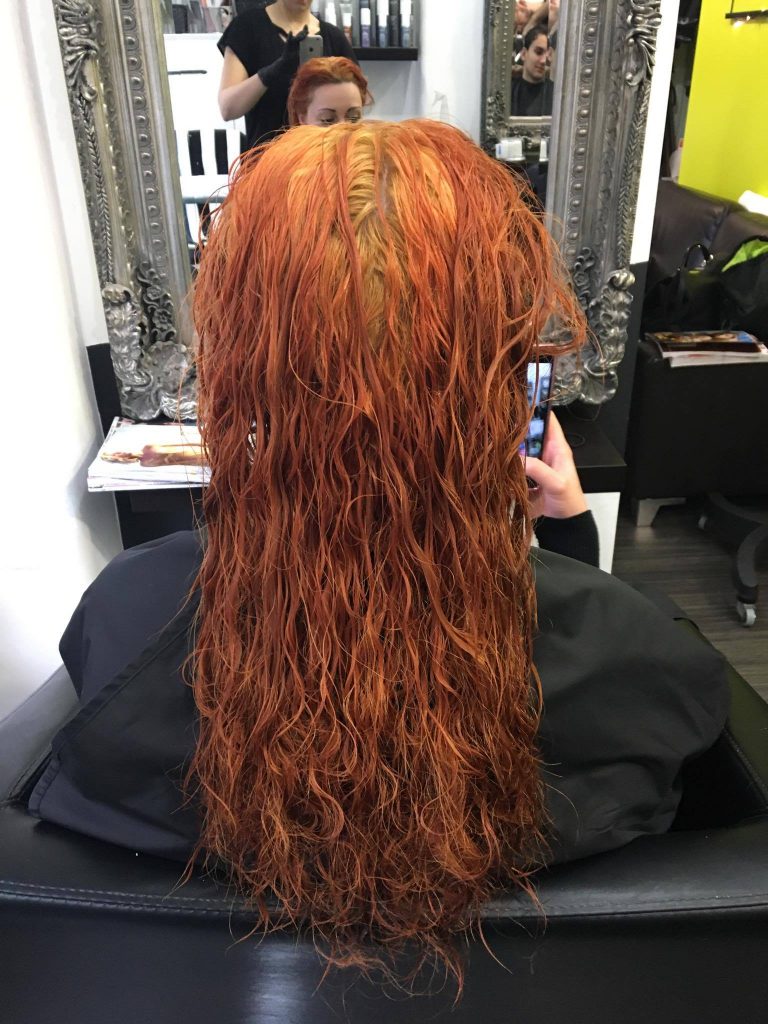
Brassy red wet hair
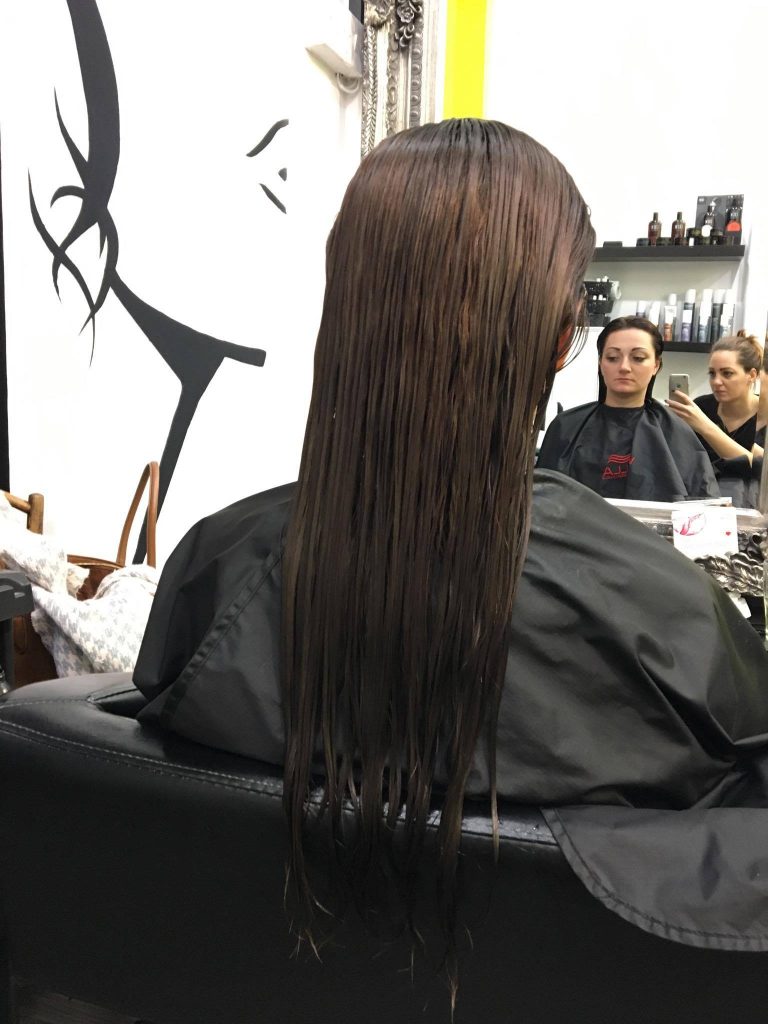
The hair is then thoroughly dried in order to see the actual colour base. Only after drying can we start thinking about mixing the appropriate cover colour. Now that’s where a colourist’s expertise comes into play where they determine how exactly to achieve the colour you’re after.

Red dried hair, which forms the base for the desired colour
Cover colour – this time: Wella Illumina – Case study
With the application of the cover colour, we re-pigmented the hair with pigments reminiscent of natural chestnut and hazelnut – a precision work to ensure even and smooth coverage. We used Wella Illumina, a premium sheer hair colour that’s luminous in every kind of light and provides superior light reflection and hair protection.
After the application and set time of the final hair colour, before the finishing blow dry
The finishing blow dry is the most exciting part of the process as it will reveal the true colour.
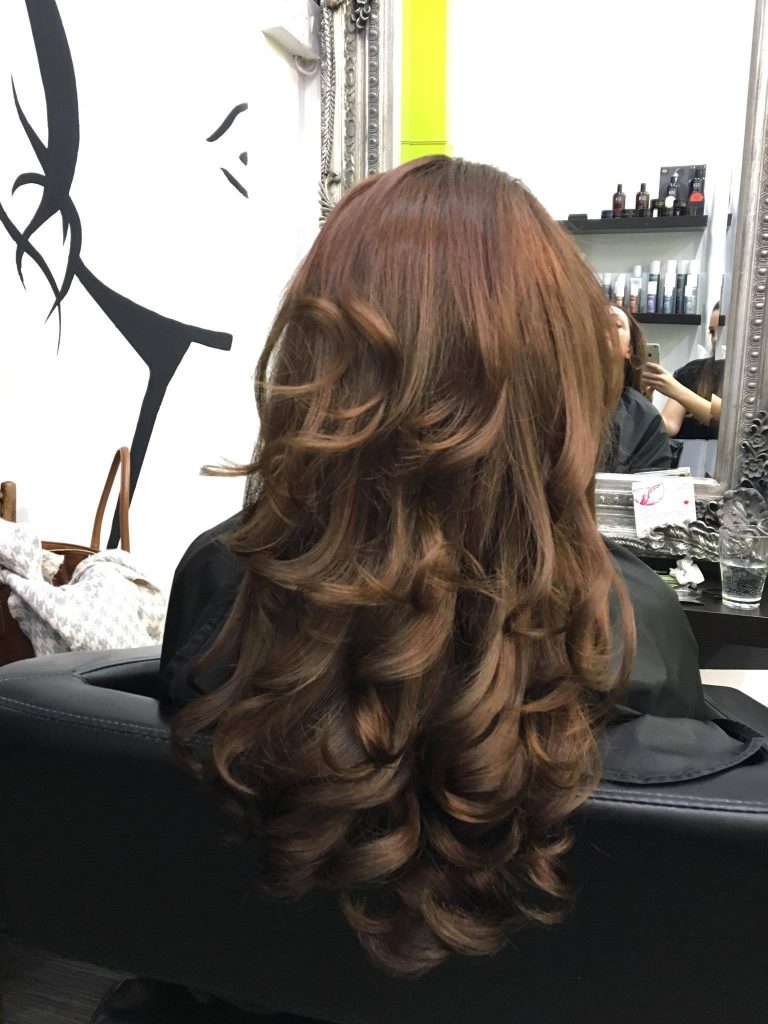
The final result: Absolutely beautiful natural chestnut hazelnut shade
As the hair grows and the natural darker shade emerges, this look can be maintained easily with a simple root touch up.
Look after your hair and protect the colour – Case Study
After a colouring session, your hairdresser would tell you not to wash your hair for at least 3 days – preferably a few days more if you can wait.
At home maintenance is absolutely crucial in order to achieve a long-lasting result and get the most out of your investment. We usually recommend Wella Colour Protecting shampoos – the range has a specific shampoo for each hair type and chemical treatment group. We tried and tested them all so we can advise you which ones would suit your hair best.
Bleached hair is more vulnerable to damage and snapping. Therefore, we highly recommend you use products that encourage the cuticles to close, so that the hairs’ moisture content and integrity is maintained.
Conditioning is very important. Leave the conditioner on your hair for at least 5-7 minutes before rinsing out.
Special pigmenting hair masks can also be used to help keep the intensity of the colour and nourish your hair. When using a mask, make sure you apply it once a week on warm, wet hair, put a shower cap (a plastic bag will also do) onto it and wrap it all in with a towel to keep the heat inside. Leave the hair mask on for 20 minutes and see the difference it will make.
Any sort of chemical process performed on your hair can make it drier than before. If your ends are more prone to get dry, a tiny bit of hair oil applied on the ends only will help a lot to prevent split ends.
We hope this article will help you understand better what goes on at a colour appointment and how you can protect your hair to minimise damage. Next time, we’ll show you another similar case study. Stay tuned.
If you have any questions, feel free to contact us
Love,
Figaro London
PS: Make sure to follow us on our social media pages for more helpful advice, inspiration and the occasional bargain offers. Here they are: Figaro London’s Official Facebook page, Figaro London Beauty page – focusing on all things beauty and skincare related, Twitter, Instagram, Google+. Looking forward to seeing you there too.